As you might know, we are going to present our flying shark at this year’s EclipseCon Europe. Since we won’t have much time there for setting up our equipment (and clearing the stage after the show), we are currently working on scaling things down – literally: Instead of a laptop running the M2M/MQTT server, we are going to make use of a second BeagleBoneBlack (BBB). Of course, it would be possible to have the M2M server running on the same BBB as the Mihini framework that commands our sharky, but we decided to keep it on dedicated hardware. After all, the M2M server in a real-world application might sit on another continent, and it is our goal to demonstrate M2M communication over the net and not on localhost.
Long story short, today we have set up our second BBB with the Mosquitto M2M server running on top of an embedded Linux. Since we had positive experience with the armhf flavour of Debian on our first BBB (with the Mihini framework), we decided to use it on our second BBB as well. After all, Mosquitto is provided as a Debian package …
The installation process was pretty straightforward – an excellent how-to can be found here. After writing the live image to a microSD card, pressing the USER/BOOT button on the BBB while disconnecting and reconnecting power causes the BBB to boot from the microSD card. Note that this worked only when we powered the BBB by USB (and not by adapter).
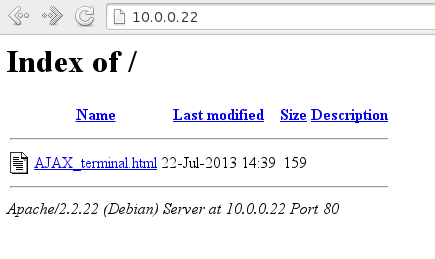
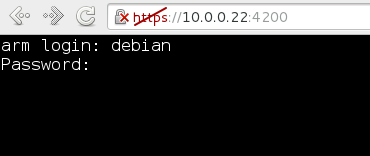
Connecting the BBB to our router, it obtained an IP address and offered a rudimentary browser terminal:
As described in the how-to, the user was “debian” with the password “temppwd”.
When logged in, we downloaded the most recent debian-armhf image from here to the /tmp folder:
The next step was to flash this image to the internal eMMC storage of our BBB:
This took some five minutes. After successfully flashing the image, we shut down the BBB, removed the microSD card and restarted it. Voilà, it came up running an embedded Debian. The only thing noteworthy was the password for the default user – in contrast to the live image on the microSD, this system uses “debian”.
What remained to be done was the installation of our M2M server. Since the Mosquitto broker is provided as a Debian package, this was as simple as
sudo apt-get install mosquitto
And voilà – mosquitto is installed and running as a service, listening on port 1883 of our BBB dedicated to MQTT:
Our next step will be to make the first BBB communicate with the second one and to subscribe to MQTT topics (and to publish of course). And after that we will set up a third BBB and use it as an additional source of commands (other than the web interface) … cool stuff coming up!


May 26, 2016 at 6:43 am |
The link to the installation process is dead… any installation pointers?
Also, do you think it’s possible to run an MQTT broker server and a Node.js server (for the purpose of running Node-Red) — at the same time?
I’m interested in using an arduino to publish to an mqtt broker (local on a bbb) and have a node-red application (also on the bbb) subscribe to the topic and send an sms. Is that do-able?
Also is there a difference between mosquitto and m2m?